
4. Basic Settings
You can implement the functions of parameter setting, display, monitoring, alarm, adjustment, etc. of the Drive in the following two ways.
Use the Panel Operator of the Drive
Use the ESView V4 (Recommended)
4.1 Panel Operator
4.1.1 Key Names and Functions
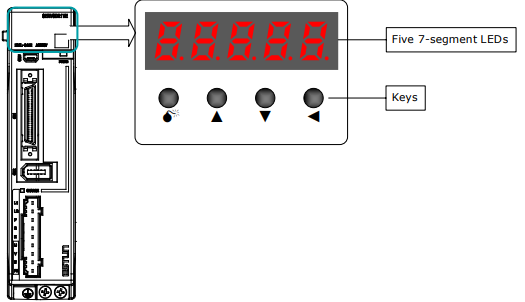
There is a Panel Operator on the front of the Drive, as is shown in Figure 4-1.
Figure 4-1 Diagram of Panel Operator
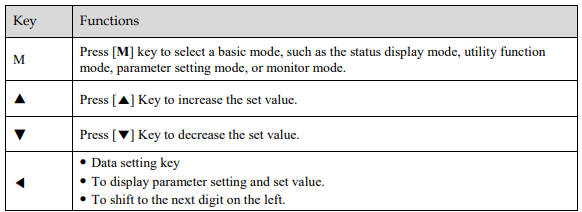
The names and functions of the keys on the Panel Operator are as follows
4.1.2 Basic Mode Selection
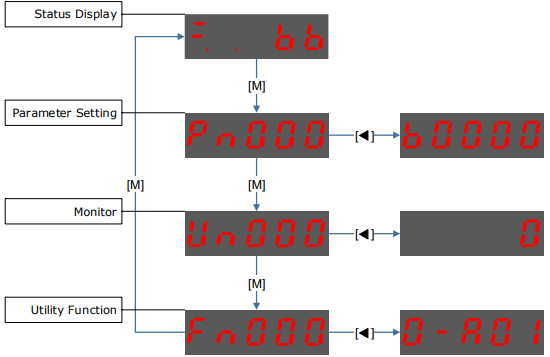
The basic modes include: Status Display Mode, Parameter Setting Mode, Utility Function Mode, and Monitor Mode.
Select a basic mode with [M] key to display the operation status, set parameters and operation references, as is shown in Figure 4-2.
Figure 4-2 Select a basic mode
4.1.3 Status Display Mode
Power ON the Drive and wait for a while, the Panel Operator will initially display the Servo Status.
The information displayed by the status is divided into two parts asFigure 4-3:
The first two digits are called Bit Data, what indicates the signal states during the operation of Drive.
The last three digits are called Code, what indicates the operation states of Driv.
Figure 4-3 Status Display
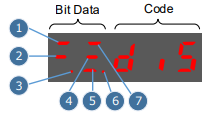
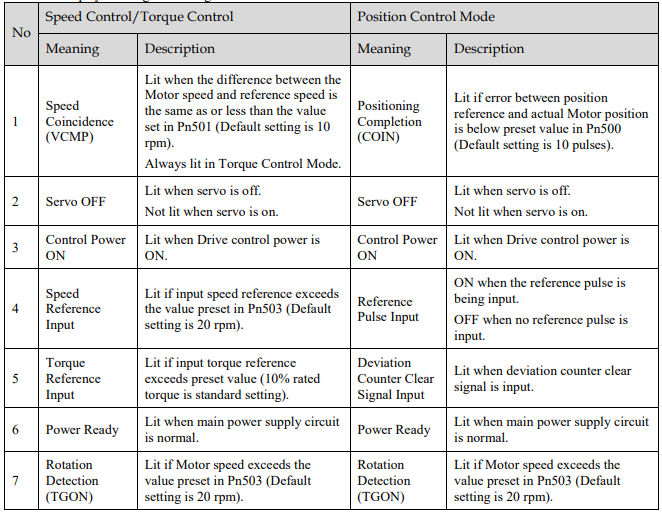
The display meaning of each segment on Bit Data are shown in Table 4-1 , and they have different meanings under Speed or Torque Control Mode and Position Control Mode
Table 4-1 Display meaning of each segment on Bit Data
The display meanings of Code are shown inTable 4-2.
Table 4-2 Display meanings of Code
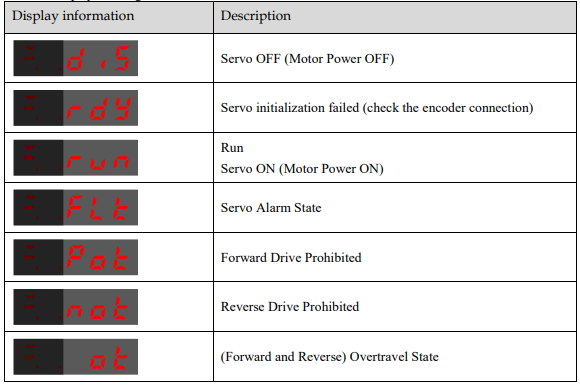

NOTE: When the Drive is in Servo Alarm State, you shall check and correct the fault according to the Alarm Number Display, and then, you can press [◄] key to try to clear the current alarm.
4.1.4 Parameter Setting Mode
Functions can be selected or adjusted by setting parameters. There are two types of parameters.
Function Parameters: the functions allocated to each digit of the Panel Operator can be selected.
Adjustment Parameters: a parameter is set to a value within the specified range of the parameter.
For a description of the parameter settings, please refer to the section Chapter 11Parameters.
Function Parameters Settin
The example below shows how to change parameter Pn003 (Application Function Selections 3) from 0000 to 1032.
Step 1 Press [M] key several times to select the Parameter Setting Mode.

Step 2 Press [▲] key or [▼] key to select the parameter Pn003.
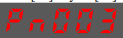
Step 3 Press [◄] key to display the current value of Pn003.
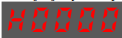
Step 4 Press and hold [◄] key for 1 second or more, and then a flashing decimal point will appear at the bottom right of the 5th digit.

Step 5 Press [▲] key twice, changing the value of the 5th digit from 0 to 2.
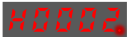
Step 6 Press [◄] key once, moving the flashing decimal point to the 4th digit.

Step 7 Press [▲] key three times, changing the value of the 4th digit from 0 to 3.
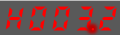
Step 8 Press [◄] key twice, moving the flashing decimal point to the 2nd digit.
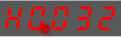
Step 9 Press [▲] key once, changing the value of the 2nd digit from 0 to 1.

Step 10 Press the [M] key once to return to the display of Pn003 parameter value.
Step 11 Press the [M] key once to display parameter Pn003.
NOTE
After completing the function parameters setting, restart the Drive to take effect.
----End
Adjustment Parameters Setting
The example below shows how to change parameter Pn102 (Speed Loop Gain) from 100 to 85.
Step 1 Press [M] key several times to select the Parameter Setting Mode.
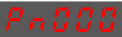
Step 2 Press [▲] key or [▼] key to select the parameter Pn102.
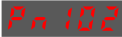
Step 3 Press [◄] key to display the current value of Pn102.

Step 4 Press [▲] key or [▼] key to change the value to 00085.
Press and hold [▲] key or [▼] key to jump the setting value quickly.

Step 5 Press [◄] key or [M] key to return to the display of Pn102.
---- End
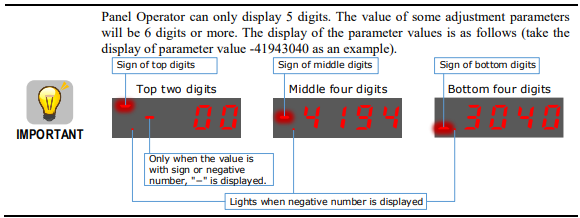
The example below shows how to change parameter Pn504 (Deviation Counter Overflow Alarm) from 41943040 to 42943240.
Step 6 Press [M] key several times to select the Parameter Setting Mode.

Step 7 Press [▲] key or [▼] key to select the parameter Pn504.
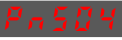
Step 8 Press [◄] key to display bottom four digits of the current value of Pn504.

Step 9 Press and hold [◄] key for 1 second or more, and then a flashing decimal point will appear at the bottom right of the 5th digit.

Step 10 Press [◄] key twice, moving the flashing decimal point to the 3rd digit.
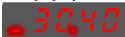
Step 11 Press [▲] key twice, changing the value of the 3rd digit from 0 to 2.

Step 12 Press [◄] key four times, moving the flashing decimal point to the 3rd of middle four digits.
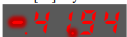
Step 13 Press [▲] key once, changing the value of the 3rd digit from 1 to 2.
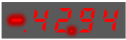
Step 14 Press the [M] key once to return to the display of Pn504 parameter value.
Step 15 Press the [M] key once to display parameter Pn504.
---- End
4.1.5 Monitor Mode
The Monitor Mode can be used for monitoring the reference values, I/O signal status, and Drive internal status.
The Monitor Mode can be selected during Motor operation.
Select Monitor Mode
The example below shows how to display, the contents of monitor number Un003 (when the Motor rotates at 100 ).
Step 1 Press [M] key several times to select the Monitor Mode.
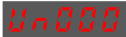
Step 2 Press [▲] key or [▼] key to select the monitor number Un003.
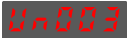
Step 3 Press [◄] key to display the data of Un003.
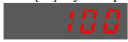
Step 4 Press [◄] key to return to the display of Un003.
---- End
Contents of Monitor Mode Displa
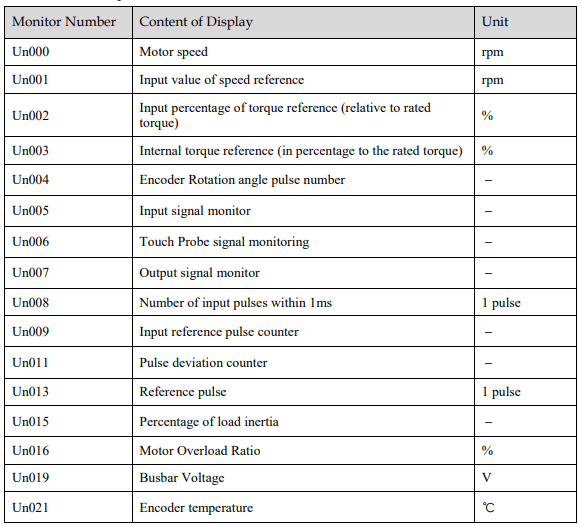

The status (low level or high level) of input signal allocated to each input terminal is displayed.
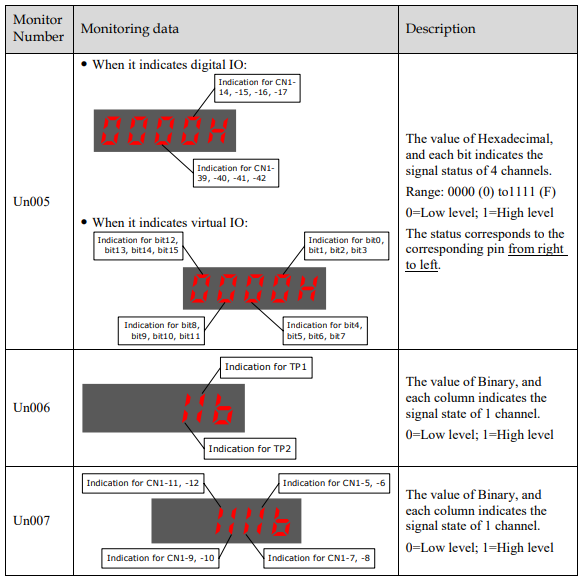
NOTE: Un007 represents the state of the output signal. The optocoupler ON and OFF of each output signal depends on whether the output signal is inverted:
If the signal is not inverted, lit for turning the optocoupler ON, and not lit for turning the optocoupler OFF.
If the signal is inverted, lit for turning the optocoupler OFF, and not lit for turning the optocoupler ON.
4.1.6 Utility Function Mode
This section describes how to apply the basic operations using the Panel Operator to run and adjust the Motor.
The following table shows the parameters in the Utility Function Mode.
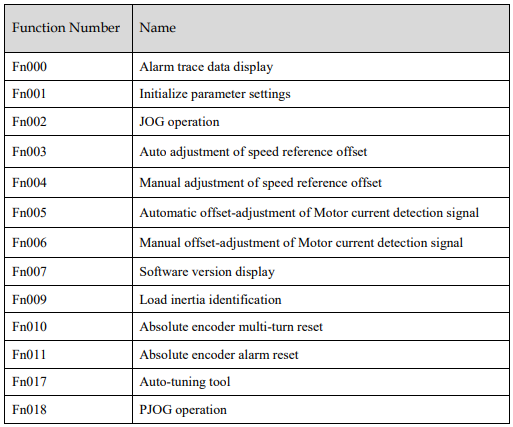
Fn000 (Alarm trace data display)
The alarm trace data display can display up to ten previously occurred alarms. The following are the steps to display the alarm trace data.
Step 1 Press [M] key several times to select the Utility Function Mode.
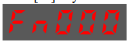
Step 2 Press [▲] key or [▼] key to select the function number Fn000.
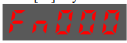
Step 3 Press [◄] key to display latest alarm number.

Step 4 Press [▲] key or [▼] key to view the other alarm data.
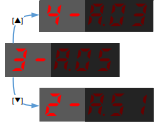
Step 5 Press the [◄] key to return to the display of the Fn000.
Press and hold [◄] key for 1 second or more to clear all the alarm trace data.
----End
Fn001 (Initialize parameter settings)
The following are the steps to initialize parameter settings.
Step 1 Press [M] key several times to select the Utility Function Mode.
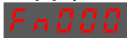
Step 2 Press [▲] key or [▼] key to select the function number Fn001.
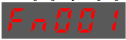
Step 3 Press [◄] key, and Panel Operator displays as below.
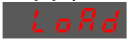
Step 4 Press and hold [◄] key for 1 second to initialize the parameter settings, until Panel Operator displays and blinks done, which indicates the initialization of parameter setting has been completed.

Step 5 Release [◄] key to return to the display of the Fn001.
----End
Fn002 (JOG operation)
This utility function often used for trial operation, refers to the section 7.3.3 JOG Operation
Fn003 (Auto Adjustment of Speed Reference Offset)
For speed control, even if the speed reference is 0V (command reference is 0 or stopped), the servo motor may move at a very low speed. By this moment, use the offset adjustment function to clear the offset. Refer to "5.9.2 Adjustment of Speed Reference Offset".
Fn004 (Manual Adjustment of Speed Reference Offset)
Refer to "5.9.2 Adjustment of Speed Reference Offset" when using the Manual Adjustment of Speed Reference Offset.
Fn005 (Automatic offset-adjustment of Motor current detection signal)
Motor current detection offset adjustment has performed at ESTUN before shipping. Basically, the user need not perform this adjustment.

The following are the steps to execute the automatic offset adjustment.
Step 1 Press [M] key several times to select the Utility Function Mode.
Step 2 Press [▲] key or [▼] key to select the function number Fn005.
Step 3 Press [◄] key, and Panel Operator displays as below.
Step 4 Press [M] key to execute the automatic offset adjustment.Panel Operator displays and blinks done, and 2 seconds later, it will return to previous display.
Step 5 Press the [◄] key to return to the display of the Fn005.
---- End