
4. Login Page
The login page will show up after launching the Software. You need to log in to a camera before controlling it.
You can refresh the camera list to show the enumerated cameras. You can select a camera to view basic information, edit IP address, reset password, etc
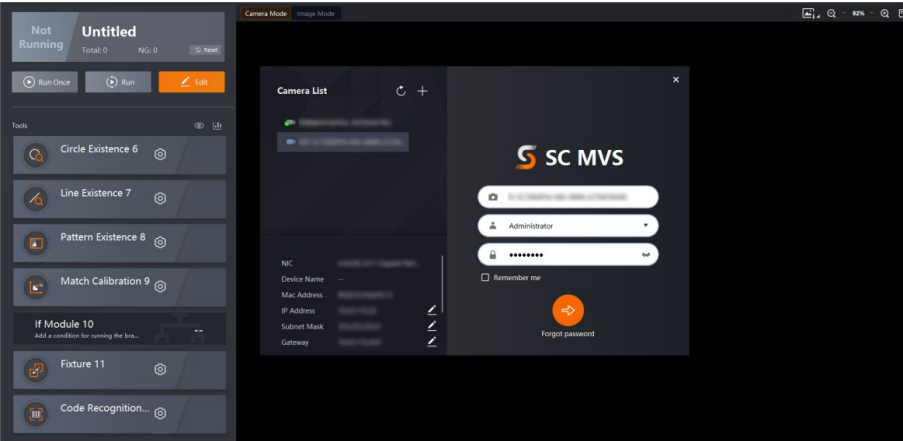
Figure 4-1 Login Page
4.1 Camera List
The camera list is on the left side of the login page. All enumerated cameras will be listed. Right-click a camera and click Stick on Top to stick the camera on the top of the list. Select a camera to view the basic information about the camera, including the NIC that connects the camera, camera name, MAC address, IP Address, subnet mask, gateway, manufacturer, model, serial number, and firmware version. See the picture below.
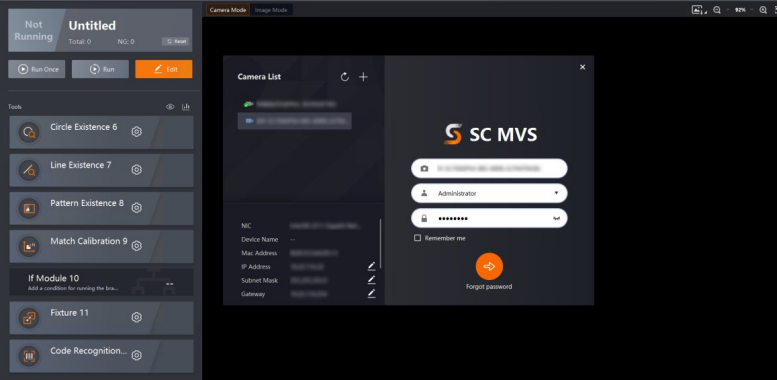
Figure 4-2 Login Page
Enumerate Camera
The Software refreshes the camera list automatically. You can also click  to refresh the list manually.
To add a remote camera, click  , type in the IP address, and click OK. See the picture below.
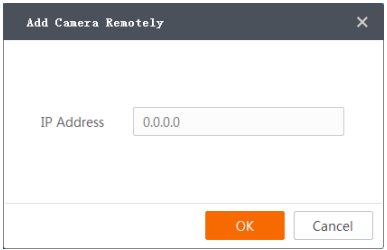
Figure 4-3 Add Camera Remotely
Note
Make sure the connection between the remote camera and the PC is established when
adding remote cameras.
Camera Status
Different icons of the camera represent different camera status
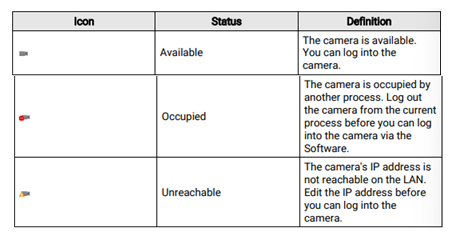
4.2 Edit IP Address
You can edit the IP address of a camera.
Before You Start
Camera status is Available or Unreachable.
Steps
1. Right-click the camera you want to edit IP address.
2. Click Edit IP Address or click beside the IP address, subnet mask, or gateway information to show the Edit IP Address window.
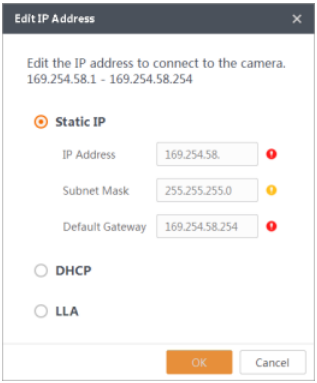
Figure 4-4 Edit IP Address
3. Select an IP type according to actual needs.
| IP Type | Description |
| Static IP | The camera will communicate with the PC via the IP address, subnet mask, and default gateway you specify. Recommended. |
| DHCP | Camera IP address is negotiated with the PC and allocated automatically. Factory default. |
| LLA | Camera IP address is negotiated with the PC and the network segment is 169.254. |
4. Click OK
Note
If you change the IP type, the camera will reboot automatically to make it effective
4.3 Log Into Camera
Before you can control a camera, you need to log in to the camera.
Before You Start
Make sure the camera status is Available.
Steps
1. Select the camera you want to log in.
2. Select a role you want to log in as. You can choose from Administrator, Technician, Maintainer, and Operator.
3. Enter the password in  .
.
Note
The default password is Abc1234. We highly recommend you to change the password after the first login to ensure the security of your device.
Caution
The password strength of the device can be automatically checked. We highly recommend you change the password of your own choosing (using a minimum of 8 characters, including at least three kinds of following categories: upper case letters, lower case letters, numbers, and special characters) in order to increase the security of your product. And we recommend you change your password regularly, especially in the high security system, changing the password monthly or weekly can better protect your product.
Proper configuration of all passwords and other security settings is the responsibility of the service provider and/or end-user.
4. Optional: Check Remember me to remember the password.
Note
If you forget the password, you can click Forgot password to reset a password. See details in Reset Password.
5. Click  or hit the Enter key to log in to the camera.
6. Optional: Click  to switch the camera.
4.4 Reset Password
If you forgot the password of a camera, you can reset the password.
Steps
1. Select the camera you want to reset password.
2. Click Forgot password to show the password reset window.
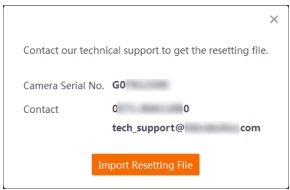
Figure 4-5 Forgot Password
3. Contact our technical support to get the password reset file. If you choose to send an email, please include the serial number of the camera in the content.
4. After getting the password reset file, click Import Resetting File.
5. Click Open to load the key file and reset the password.
Note
The camera password will be restored to Abc1234. We highly recommend you change the password after login to ensure the security of your device.