
7. Project Management
On the top of the Software, click Project to open the Project Management window to view all the projects of the camera and manage the projects.
The name, saving time, and the base image of the project will be displayed.
You can create, import, refresh, export, copy, or delete a project. See Project Settings for details.
You can also set the condition of starting switching a project, or switch a project. See Switch Project for details.
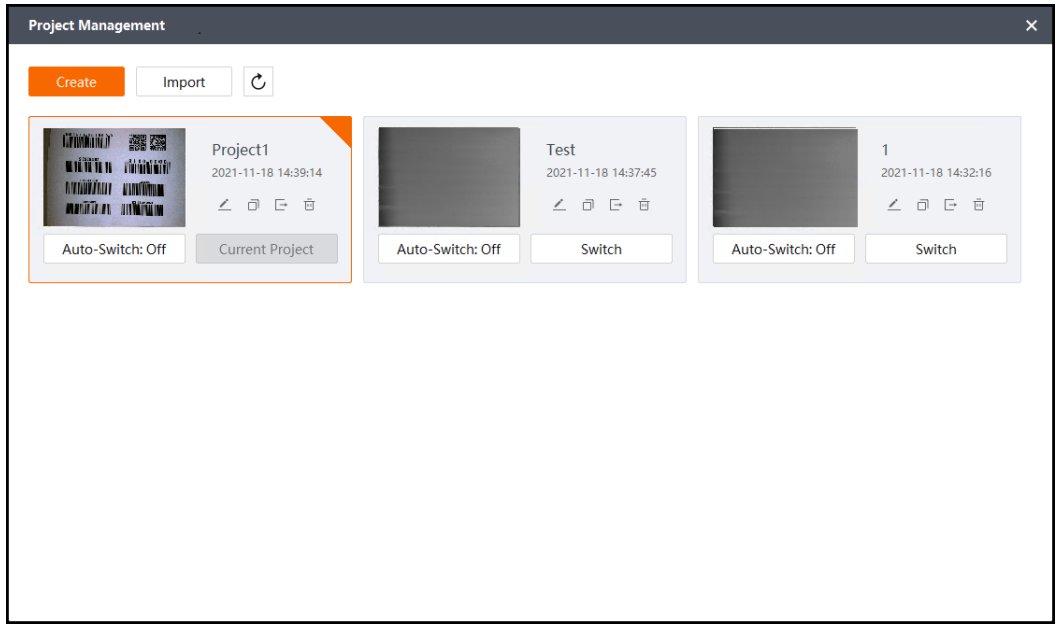 Figure 7-1 Project Management
7.1 Project Settings
You can create, import, export, edit, copy, and delete projects.
● Create a Project: Click Project → Create to enter the Edit Project page.
● Import a Project: Click Project → Import and select the to-be-imported project file and click Open.
Note
○ Only the project of the same camera model can be imported.
○ It is also recommended that the firmware version of the project's camera is the same with the current camera, or the importing may fail.
● Refresh Project(s): Click  .
.
● Edit a Project: Click  of a project to enter the Edit page.
Note
If the edited project is not the running one, a prompt will pop up asking whether to
switch the project and start editing. Click OK to switch the project and start editing.
● Copy a Project: Click , edit the project name and click OK. By default, the project name is "the current project name_Copy".
● Export a Project: Click , select the saving directory and click Save.
● Delete a Project: Click → OK.
Note
You cannot delete a running project.
7.2 Switch Project
If you have set multiple projects for one camera, you can switch among them.
You can switch projects manually or enable Auto-Switch to switch projects automatically.
● Manual Switch: Click Switch in a project area to load this project.
Note
○ A prompt window will pop up to remind you to save the project currently used before switching.
○ If a project is being used currently, the Switch button is changed into Current Project, and the project cannot be switched.
● Auto-Switch: Click the button beside Switch to set auto-switch. You can select from Off, TriggerIO, and TriggerCommunication.
○ Off: Auto-Switch is disabled. The button is displayed as "Auto-Switch: Off".
○ TriggerIO: Switching project automatically by triggering the signal source via I/O. You need to set the I/O trigger source.
○ TriggerCommunication: Switching project automatically via the string sent by the communication tool. You need to set the communication string and the return string.
TiggerIO
If the auto-switching mode of a project is set to TriggerIO, the project will be automatically set to the running project when the received signal meets the requirements of the configured switch trigger source and is received within the IO synchronization time range. To enable TriggerIO, you need to configure the IO synchronization time, switch trigger source, and project name. For details, seeProject Switch Settings
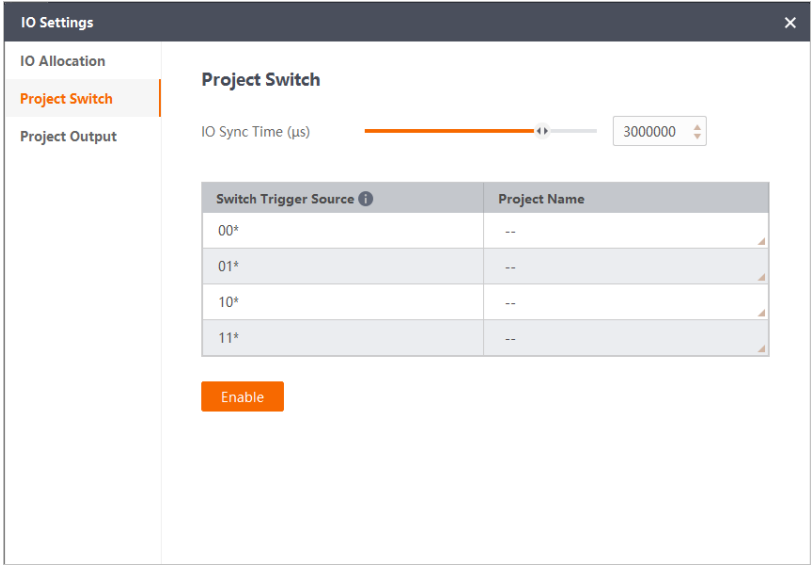
Figure 7-2 TriggerIO
TriggerCommunication
If the auto-switching mode for a project is set to TriggerCommunication, the project will be automatically set to the running project when the communication protocol of the project sends a message "Communication String + Spacebar + Project Name"
Note
● Communication String: The string sent to the device via a communication protocol. The default value is "switch".
● Switch Return String: The value returned by the device after a successful project switch. The default value is "ok".
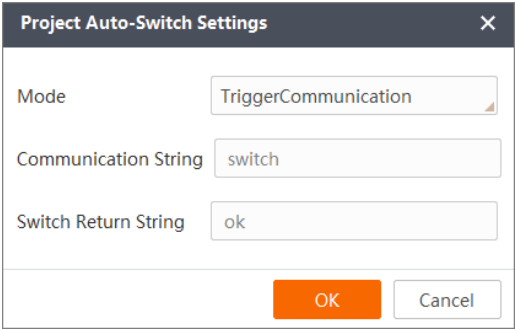
Figure 7-3 TriggerCommunication
Note
All communication protocols except for FTP can send messages to switch the project. Ethernet/IP, Profinet and Modbus cannot receive the switch return string after a successful project switch.
7.2.1 TriggerIO
When the auto-switch mode of a project is set to TriggerIO, this projects will be set to Current Project if the received signal meets the requirement of the configured I/O trigger source and is received within the line back time.
The I/O trigger source consists of five digits, and each digit is either 0 or 1. The digits, from the first to the last, correspond to the I/O signal's Line4, Line3, Line2, Line1, and Line0. If the I/O type of the I/O signal is set to SolutionSwitch and the trigger type is set to Level High, the corresponding digit is 1; if the I/O type is set to SolutionSwitch and the I/O trigger mode is set to Level Low, the corresponding digit is 0; if the I/O type it set to Trigger or Output, the corresponding digit is 0.
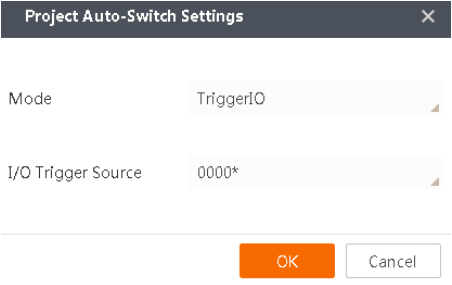
Figure 7-4 TriggerIO
Moreover, you need to set the Line Back Time in I/0 Settings. If several I/O signals are set to Level High when switching a project, the interval between the first and the last signal received should be within the configured line back time
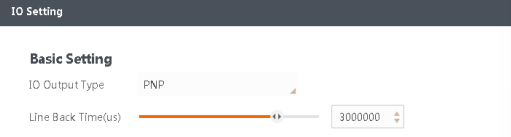
Figure 7-5 Line Back Time
If the I/O trigger source of a project is set to 10110 and the line back time is set to 3 seconds, it is necessary to ensure that the I/O type of Line1, Line2, and Line4 is set to SolutionSwitch, and the these three signals should be sent to the camera within 3 seconds so that the project cannot be switched automatically.
7.2.2 Trigger Communication
If the auto-switch mode of one project is set to "TriggerCommunication", and the communication tool used in this project sends the required string and project name to the camera, this project will be set to "Current Project".
● Communication String: The content of the string sent by the communication tool, which is set to "Switch" by default.
● Switch Return String: The content of the string sent to the communication tool by the
camera after switching the project, which is set to "OK" by default.
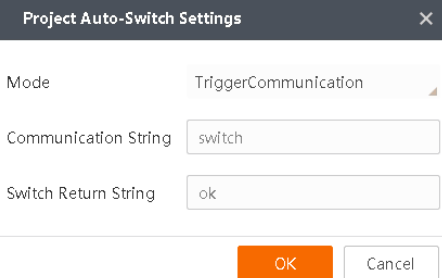
Figure 7-6 TriggerCommunication
Note
Except the FTP tool, Ethernet/IP tool, and Profinet tool, all of the other communication tools can send command to switch projects to cameras, while the Modbus tool cannot receive the switch return string after switching projects.