86. Set cMT-SVR Network
How to set up the Ethernet connection of cMT-SVR?
cMT-SVR has two Ethernet ports. You can set the IP as DHCP or Static IP. This document shows how to check the IP address and set the IP when using a new cMT-SVR.
cMT Viewer
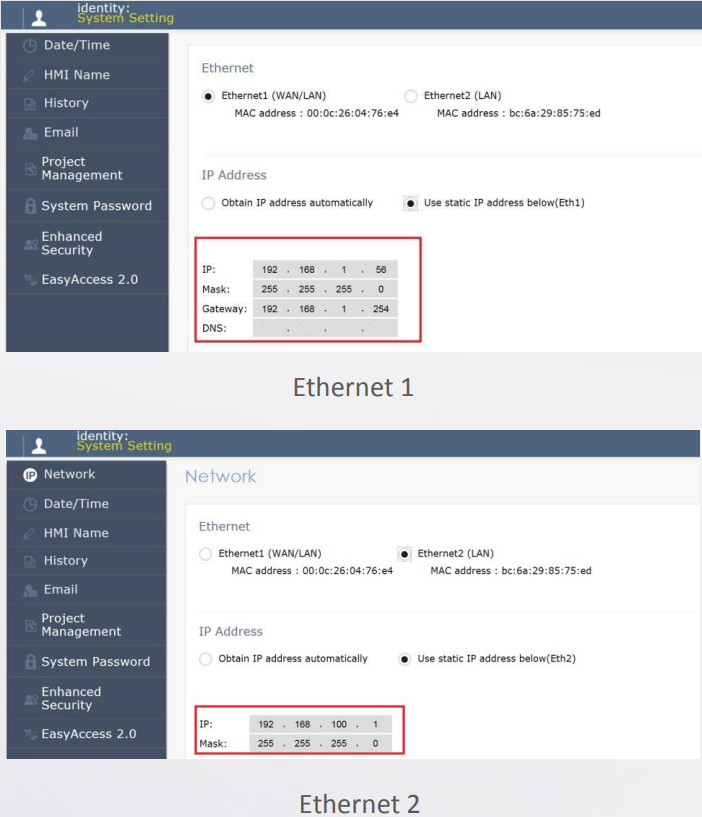
Step 1. cMT-SVR has two Ethernet ports: Ethernet 1 and Ethernet 2. Ethernet 1 can be set to link the external network, whereas Ethernet 2 can only be set as local area network. The default setting of Ethernet 1 is DHCP, and Ethernet 2 is the Static IP. The default IP addresses are as follows:
IP: 192.168.100.1
Mask: 255.255.255.0
Step 2. At the first time setting cMT-SVR, we would recommend connecting the Ethernet cable to Ethernet 1, and using DHCP.
Step 3. On your PC, open: [Start] » [Programs] » [EBpro] » cMT Viewer.
Step 4. Press the Start Button on cMT Viewer to enter the setting page.

Step 5. Press Search, and choose the cMT-SVR you want to set up.
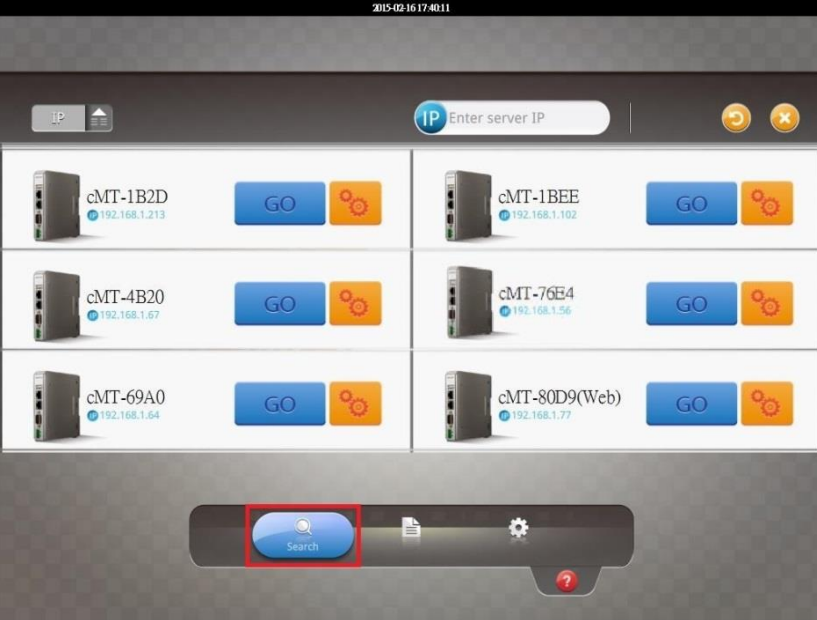
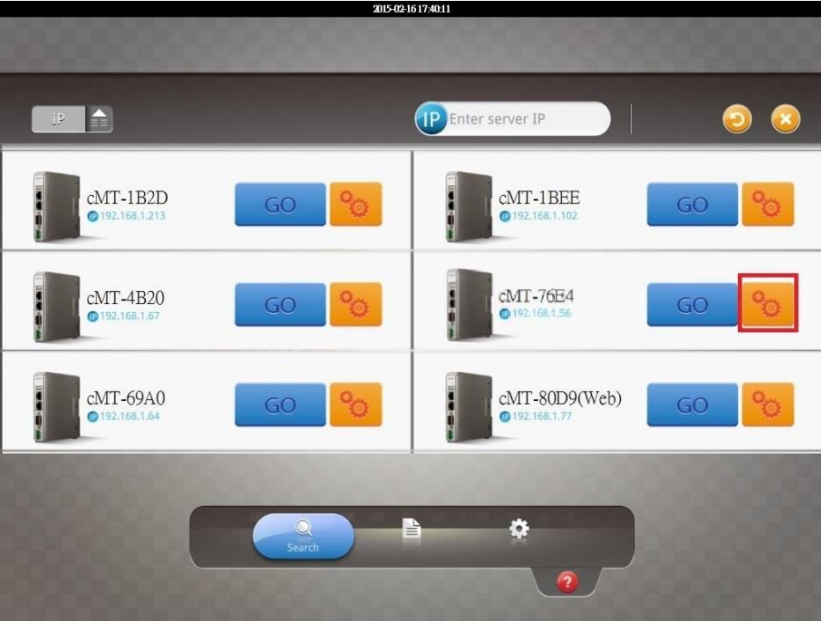
Step 6. Press the setting button of the cMT-SVR you choose.
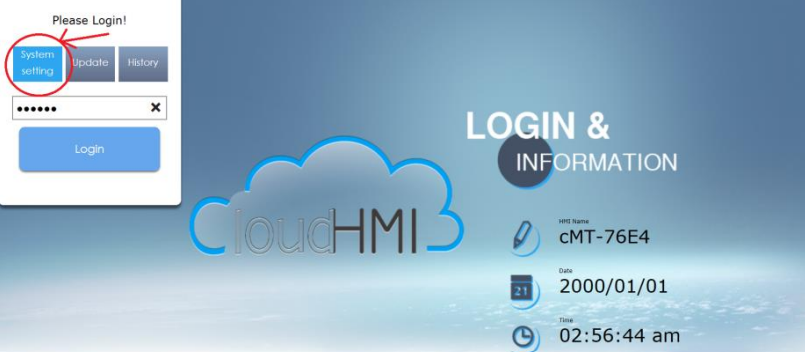
Step 7. The browser of the PC will open the setting page. Choose System Setting, and then enter the password. (The default setting is 111111)
Step 8. After login, the page will lead you to the setting page of Network. You can choose whether to set the IP of Ethernet 1 or Ethernet 2 as DHCP or Static IP.
Please note that Ethernet 1 can be set to link the external network, whereas Ethernet 2 can only be set as local area network. If you would like to use both Ethernet ports at the same time, please do not set both of them under the same local area network.