
1.TRANSPORTATION AND INSTALLATION
1.1. TRANSPORTATION

Turn each axis to transportation gesture before move the robot and be sure to keep the gesture during transportation until it be properly installed and mounted. Transportation gesture of each axis is shown below. Refer below perform the transportation properly, or it may result in personnel injury or equipment damage.

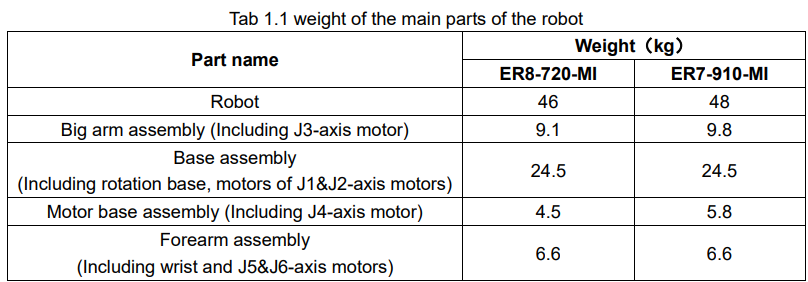
When installing, disassembling and transporting the robot, the weight of the robot is an important parameter. The following table lists the theoretical weight of the main parts of the robot.

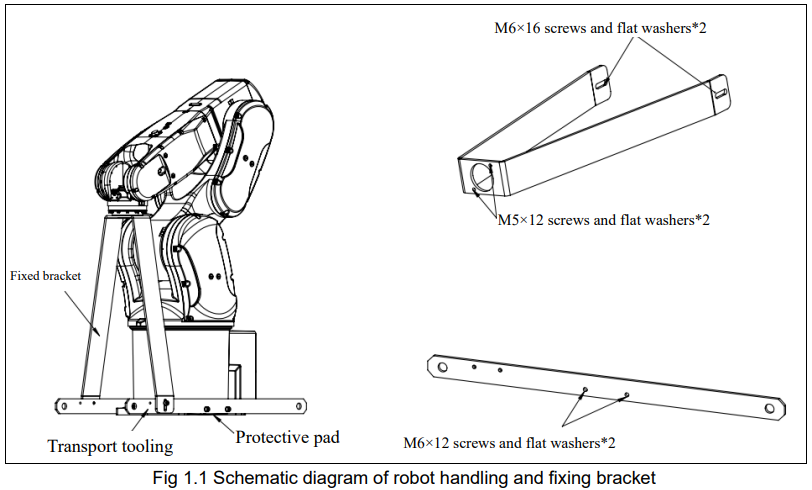
When the robot is transported, it is necessary to install the fixing bracket and the protective pad. Before installing the robot, remove the fixing bracket and protective pad. The following chart lists the screw hole size of the fixing bracket and the position of the protective pad, which is convenient for users to disassemble.
1.1.1.Transportation Method
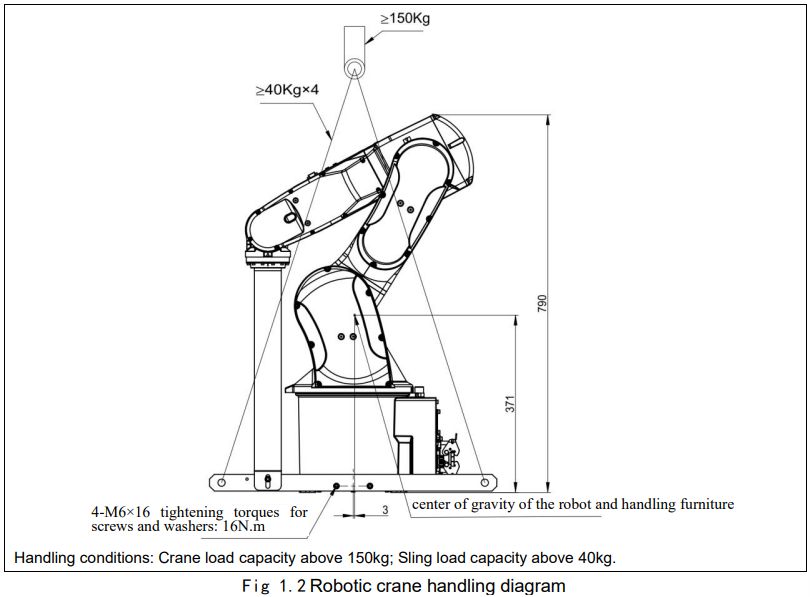
Use a crane to transport ESTUN small robot. Move the robot to zero point position. Fix two special brackets on both sides of the robot base, use a crane to heave the robot with 4 slings. Make sure that the fixed bolts of the robot are removed before transportation.

1.2. INSTALLATION

The following precautions must be fully understood and observed before installing the robot:
Be sure to read and understand INSTRUCTIONS FOR SAFE USE chapter thoroughly.;
Ensure that the robot is installed by a qualified installer, and the installation procedures must comply with local legal regulations;
Check the external damage of the robot package. Open the package and check the external damage of the robot;
Make sure that the lifting equipment can bear the weight of the lifting robot parts when installing the robot. Details see Section 1.1 TRANSPORTATION.
Storage and mounting condition should be complied with Section 1.3 INSTALLATION CONDITION.


1.2.1.Bench
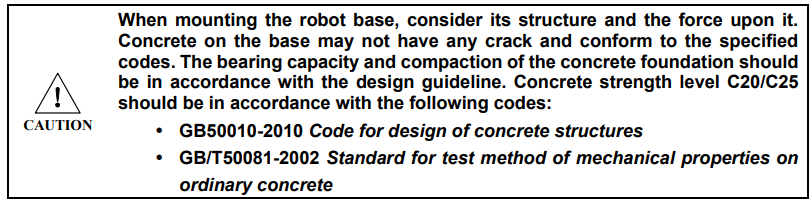
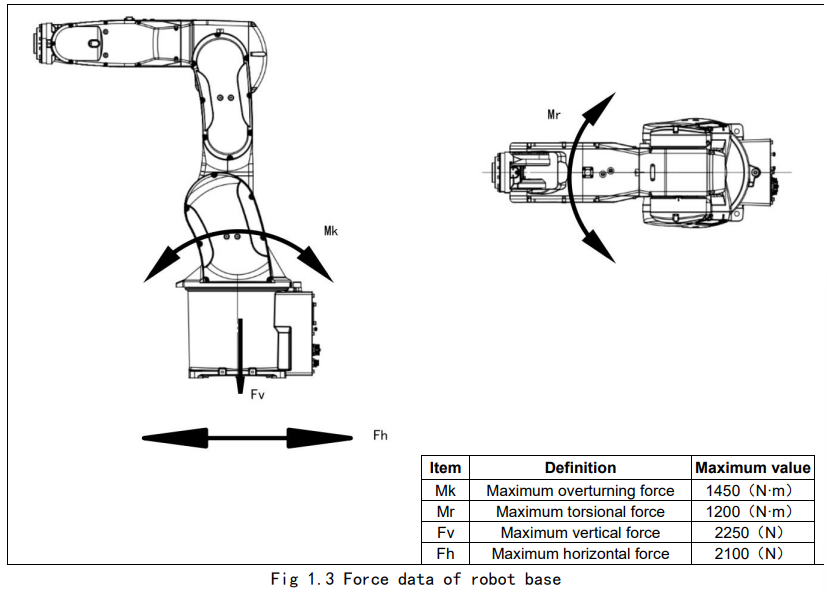
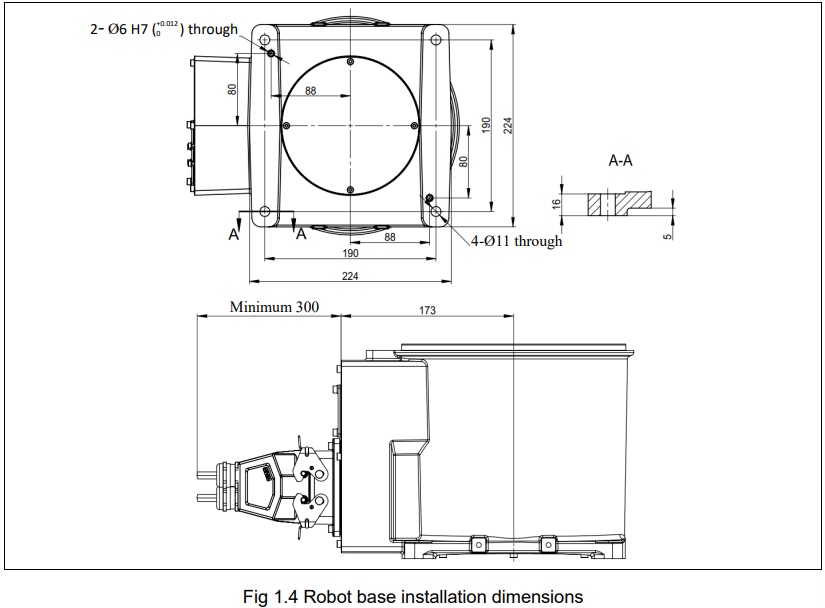
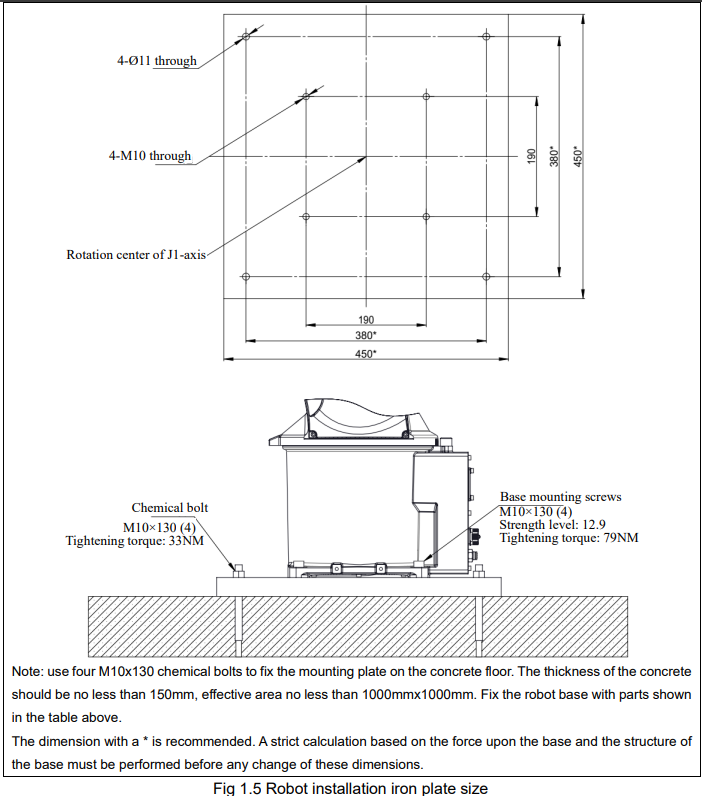
A pedestal for anchoring the robot is not provided. Please make your own stand for fixing the robot. The shape and size of the gantry varies depending on the purpose of the robotic system. The gantry must not only support the weight of the robot, but also the dynamic forces when it moves at maximum acceleration. Ensure that the bench has sufficient strength by connecting reinforcing materials such as beams. In order to suppress vibration, it is recommended to use a steel plate with a thickness of 25mm or more for the robot mounting surface. According to the maximum height condition, the surface roughness of the steel plate should be below 25um. Secure the stand to the outside (floor or wall) and do not move.
1.3. INSTALL CONDITIONS

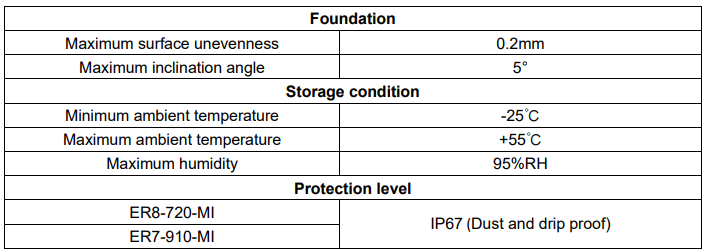
Performance of resistant chemicals and resistant solvents are as follows:
(1) The following liquids may cause deterioration or corrosion of the rubber parts (seals, oil seals, Orings, etc.) on the robot, so please do not use them. (Except for products approved by our company)
(a) Organic solvent
(b) Chlorine-based and gasoline-based cutting fluids
(c) Amine-based cleaning agent
(d) Acid, alkali and liquid causing rust
(e) Other liquids or solutions, that will harm NBR or CR rubber
(2) When using the robot in an environment where liquid such as water splashes on the robot, pay sufficient attention to the drainage of the base. If the drainage is insufficient and the base is frequently flooded with water, it will cause the robot to malfunction.
(3) Do not use cutting fluid or cleaning fluid with unknown properties.
(4) The robot cannot be immersed in water for a long time, or used in an environment that is easily wet. For example, in the case of an exposed motor, if the motor shows that it has been wet for a long time, the liquid can penetrate into the motor and cause a failure.
No comments to display
No comments to display