
6. Zero Calibration
6.1. Introduction
Zero Calibration associates the angle of each robot axis with the pulse count value supplied from the absolute Pulsecoder connected to the corresponding axis motor. To be specific, zero calibration is an operation for obtaining the pulse count value, corresponding to the zero position.
“Zero Calibration” is factory-performed. It is unnecessary to perform calibration in daily operation.
However, calibration becomes necessary after:
Motor replacement
Pulsecoder replacement
Reducer replacement
Cable replacement
Batteries for pulse count backup in the mechanical unit have gone dead

6.2. Calibration with instrumentation
During the factory setup, all loads on the robot need to be removed, and instrumentation is used for calibration. This calibration method is based on the complete set of robot parameters and utilizes instrumentation and software to achieve the most precise zero-point calibration.
In case of electrical or software issues resulting in the loss of zero-point data, restoring the previously stored zero-point data serves as a quick teaching and debugging reference. However, if mechanical disassembly or repairs lead to the loss of robot zero-point data, this method cannot be applied.
ESTUN employs robot encoder information to assist in zero-point calibration, following these
steps:
a) Manually operate the robot and align the axis with two zero reference marks.
b) Open the encoder information display interface and compare the current actual single-turn data with the previously calibrated reference single-turn data. Adjust the axis at a lower speed to make the current single-turn data closely match the reference single-turn data.
c) Calibrate the zero point of the axis. Create a new program in the teach pendant, add the "RefRobotAxis" instruction, select the axis to be calibrated, and execute the command.
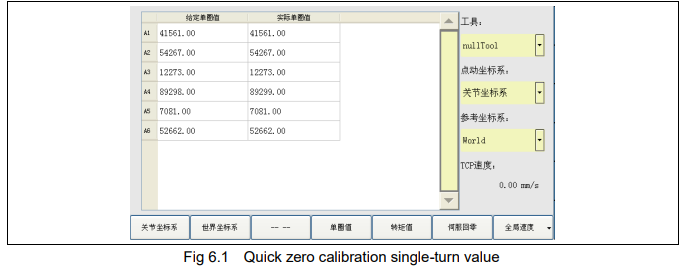
6.3. Mechanical zero calibration
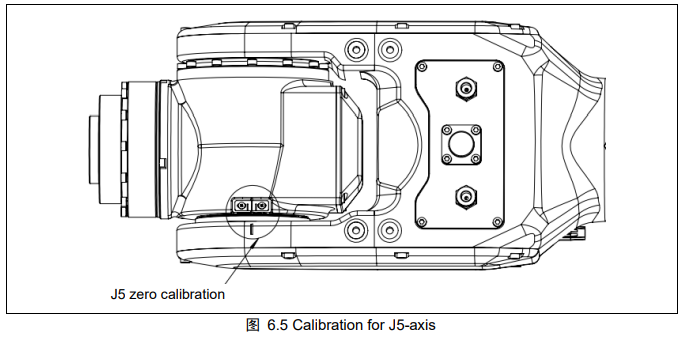
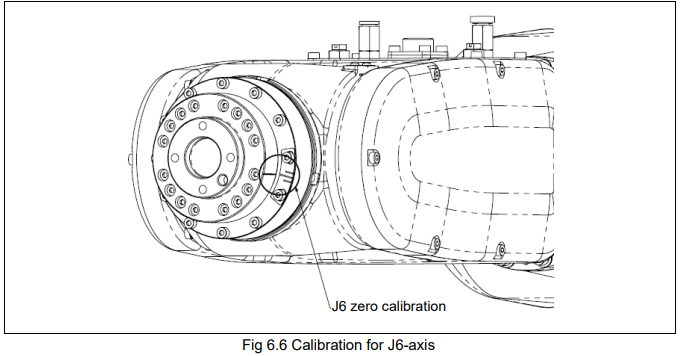
Mechanical disassembly or maintenance may cause zero position data lost. Mechanical zero position calibration is performed with all axes jogged to zero-position using their respective witness marks.
Take J1-axis for example of zero position calibration. As shown in the figure below, there are witness marks on the base and rotation base.
Move the axis to align the marks as the procedures below.
a) Use teach pendant to move J1-axis to the position where two marks are aligned.
b) Set this position as zero position of J1-axis with the teach pendant.
Perform zero position calibration for each axis with procedures recommended above. If calibration for all axes has been performed and recorded, zero position for each axis can be set with teach pendant. Figures in this section are reference for calibration of other axes.
6.3.1.ER10-900-MI/HI mechanical zero calibration
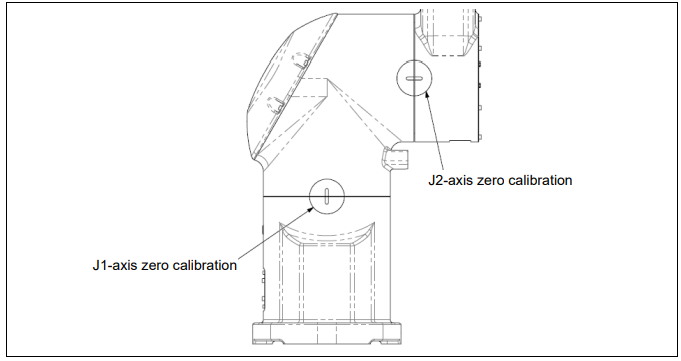
Fig 6.2 Calibration for J1-axis and J2-axis
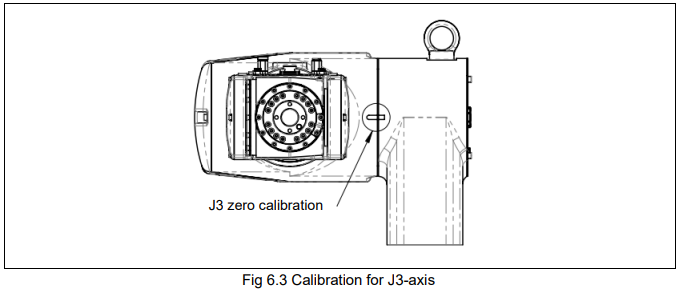
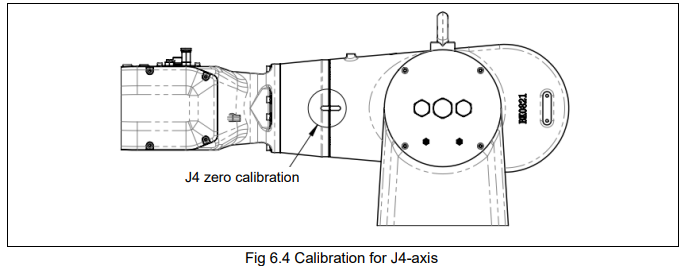
No comments to display
No comments to display