
Dekompilacja pliku .exob do projektu .emtp
Streszczenie: Dekompilacja skompilowanego projektu .exob do edytowalnego pliku .emtp w EasyBuilder Pro ([Tool] » [Decompile]) – wymagane hasło EXOB nadane przy kompilacji.
EN: How to decompile an .exob file into an editable .emtp project in EasyBuilder Pro using the EXOB password.
Dotyczy: EasyBuilder Pro
Źródło: Weintek FAQ (materiały producenta), oryginalny tytuł: „How to decompile files?”
This FAQ introduces how to decompile .exob file to .emtp file, and then edit the file in EasyBuilder Pro.
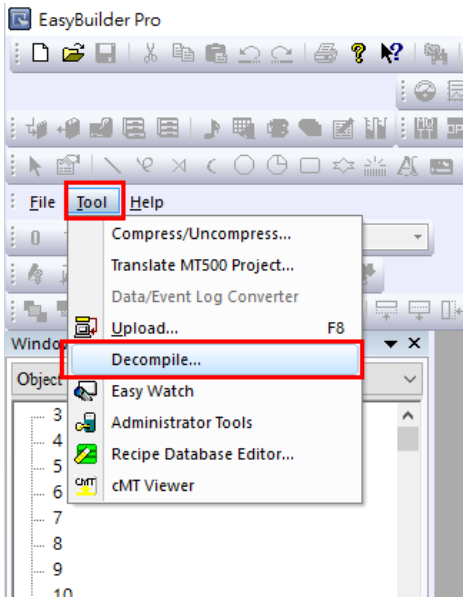
Step 1. Run EasyBuilder Pro, and click [Tool] » [Decompile].
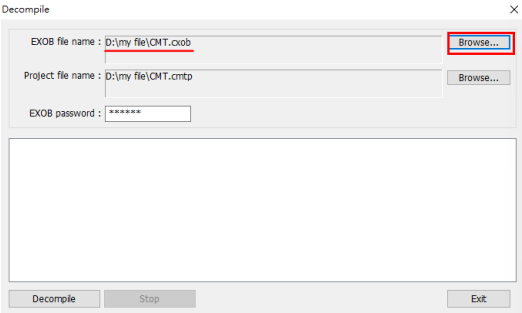
Step 2. When the Decompile dialog box pops up, click [Browse] and choose an .exob file. Designate the destination directory.
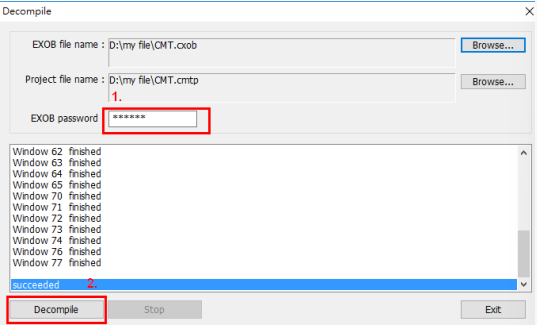
Step 3. After the .exob file is selected, enter the EXOB password. The EXOB password was created when compiling the project. After that, press [Decompile] button, and then a “succeeded” message shows that the .exob is completely decompiled
Step 4. Click [File] » [Open]. The .exob file is decompiled to an .emtp file. Open this file and start to edit it

Słowa kluczowe
dekompilacja, decompile, plik .exob, plik .emtp, hasło EXOB, odzyskanie projektu, EasyBuilder Pro, How to decompile files?
No comments to display
No comments to display