
12. How to Setup the Printer
The following are the instructions for setting up the printer (take HP printer for example):
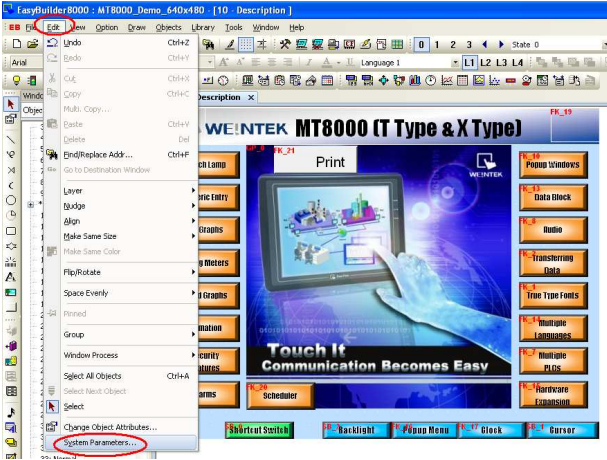
1. Setup the printer: Run EasyBuilder Pro, select “Edit / System Parameters”;
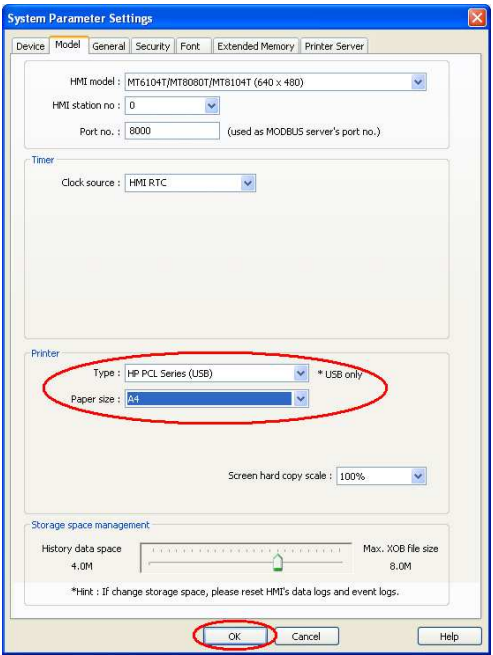
2. Switch to the “Model” tab, select the printer type: HP PCL Series (USB) and setup the paper size.
There are two ways to start the printer:
A. By the function key;
B. By the PLC control;
3. Start the printer by function key;
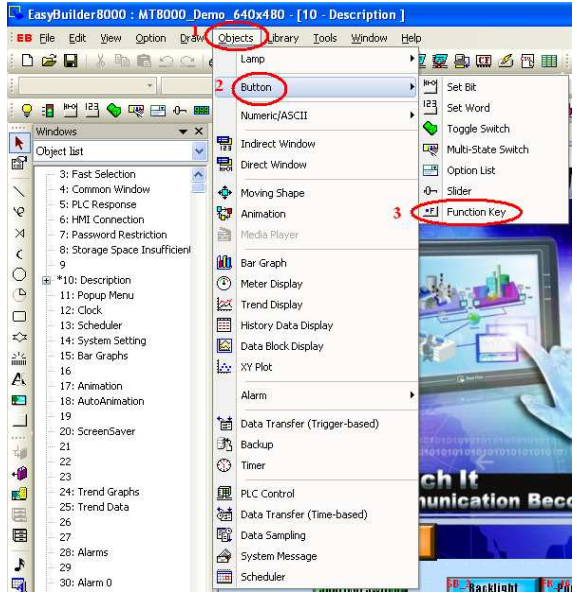
3.1 Select ”Objects / Button / Function Key”;
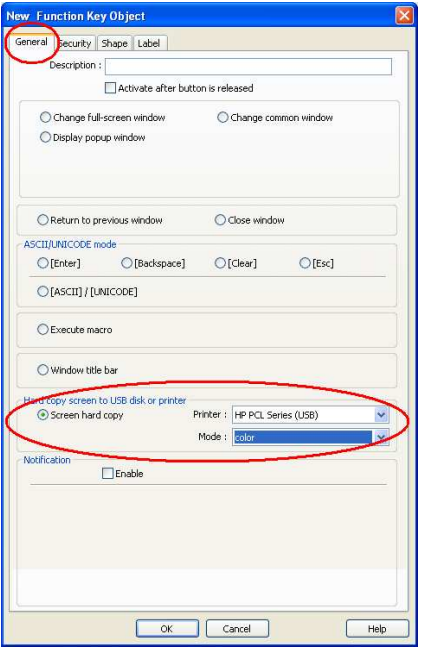
3.2. In the “New Function Key Object” window, select “Screen hard copy” under the “General” tab.
Select the printer: HP PCL Series (USB); Click “OK” to create a printer function key.
3.3. Connect the printer to HMI. You can now simply click the “Print” button object that you just created on the screen.
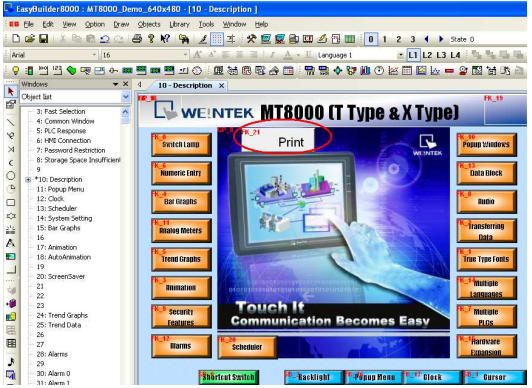
4. Start the printer by PLC control;
4.1. Select ”Objects / PLC Control”;
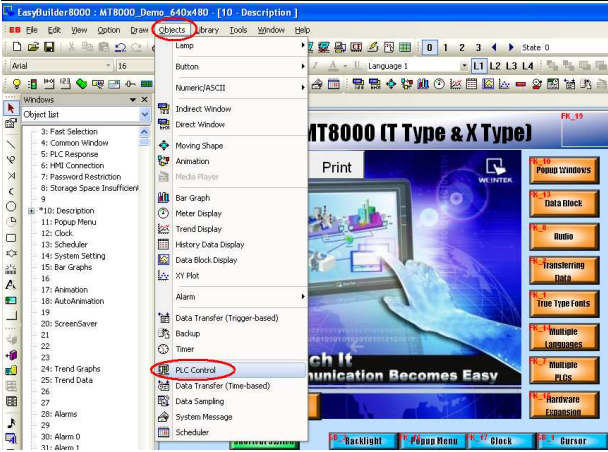
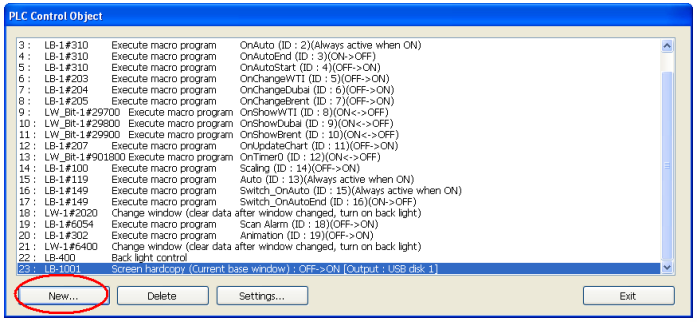
4.2. Click “New” button in the “PLC Control Object” window;
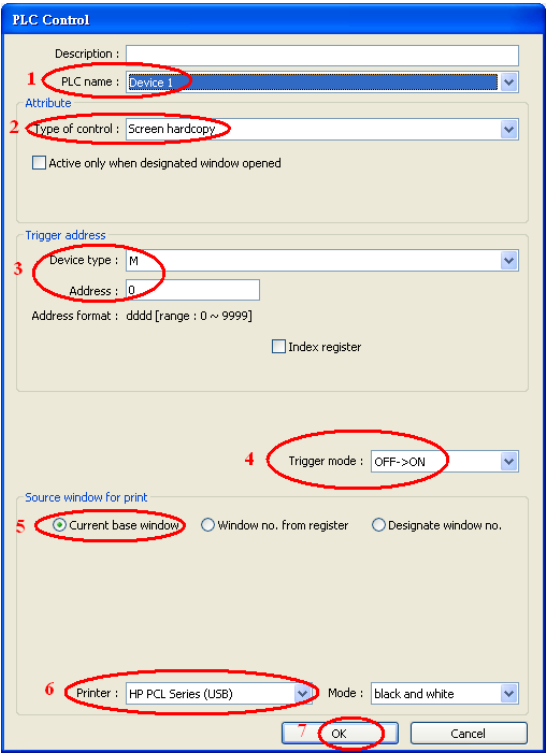
4.3. Select the corresponding PLC name; Set the “Type of control” to “Screen hardcopy”; Select the “Device type” and “Address” to M0; Select the “Trigger mode” to “OFF->ON”; Select the printer: HP PCL Series (USB), and click “OK” to complete. Run the program, setup the M0 address in the PLC program to start printing.
Notice:
Trigger mode: OFF->ON; Switch the object to ON status to start printing;
ON -> OFF: Switch the object to OFF status to start printing;
OFF <-> ON: When the object status is changed, either from OFF to ON or from ON to OFF, the printer will be started.
Source window for print:
Current base window: When the object is triggered, printer starts printing the current screen display;
Window no. from register: The PLC words controls the window number;
Designate window no.: The printing image is assigned in the program;
No comments to display
No comments to display