
90. How to embed Pictures and Shapes into project file?
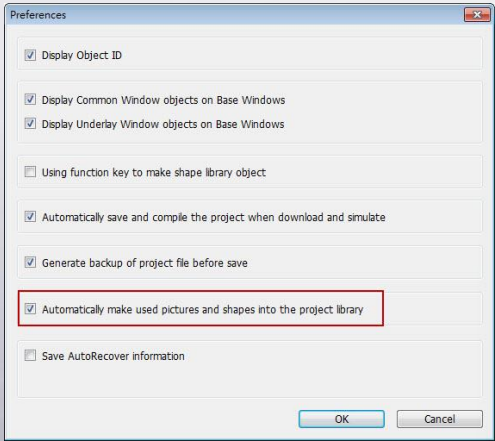
For a new project built by using EasyBuilder Pro, you only need to do step 1 as shown below.
Step 1. In EasyBuilder Pro main menu click [Option] » [Preferences] and then select the [Automatically make used pictures and shapes into the project library] check box. The pictures and shapes used after selecting this check box will be automatically embedded into the project file, whereas the pictures and shapes used before selecting this check box should be copied into the project library manually, as shown in the following steps.
 Step 2. Click [Library] » [Picture] » [Call up library].
Step 3. Go to [Library] tab, click  icon of each picture to copy the picture
to project file one by one.
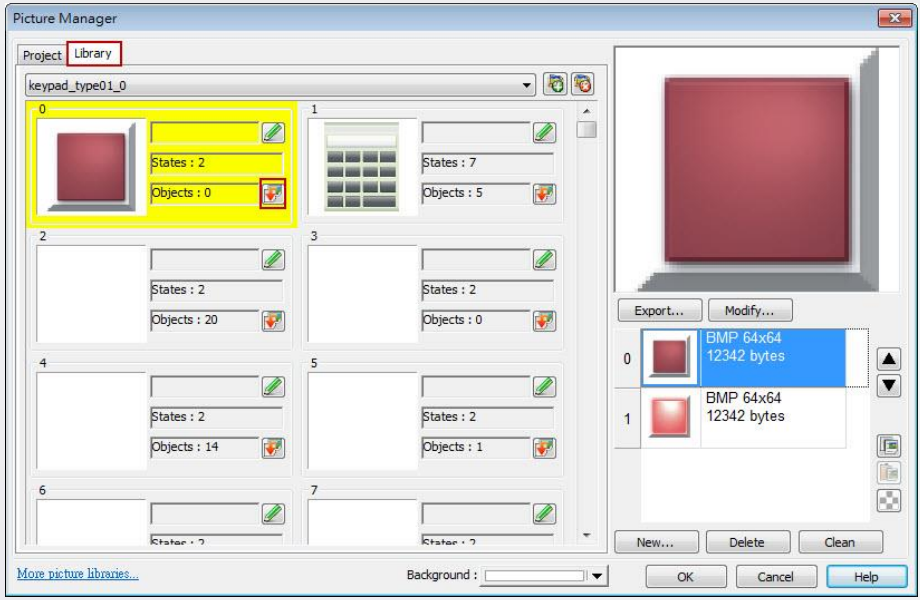
Step 4. If the picture is successfully copied, you will see this message: “All objects using this picture will refer to the new copy.”
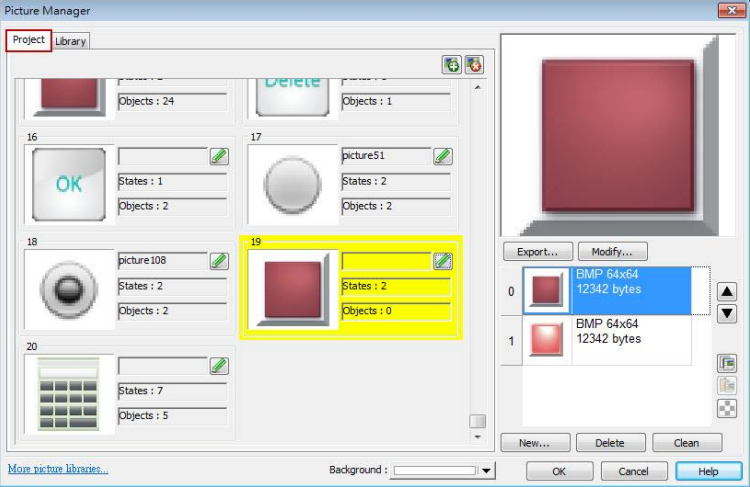
Step 5. Go to the [Project] tab, you will find the picture just copied, and it’s embedded into the project.
Step 6. To embed a Shape, select [Library] » [Shape] » [Call up library], and then do Steps 3 to 5. Please note the by default the shapes are already embedded into the project file, therefore only the self made shapes need to be manually copied.
No comments to display
No comments to display