
81. Set IP for new HMI
How to quickly assign an IP address of a new HMI in order to download projects without a router?
New HMI arrives having DHCP setting, and IP address of 0.0.0.0. To enable network functions, it is necessary to connect the HMI to a DHCP server (usually by means of a router) or manually enter the IP address. This document explains how to use the pre-loaded program to assign a preset IP address, without having to manually assign one. With a valid IP address, projects can then be updated over Ethernet.
This feature is now built into the demo projects for the iE, XE, and eMT series.
The feature is located in the system setting/testing page of the demo project. Refer to the figures below for illustration.
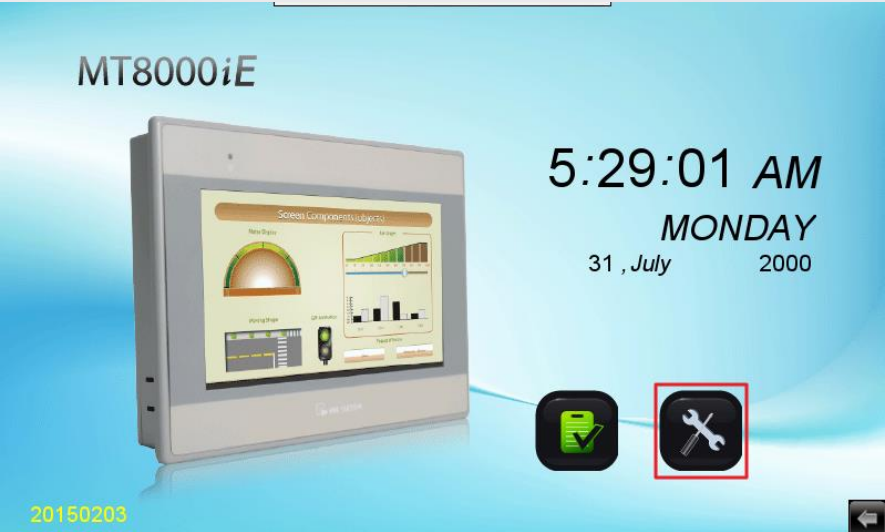
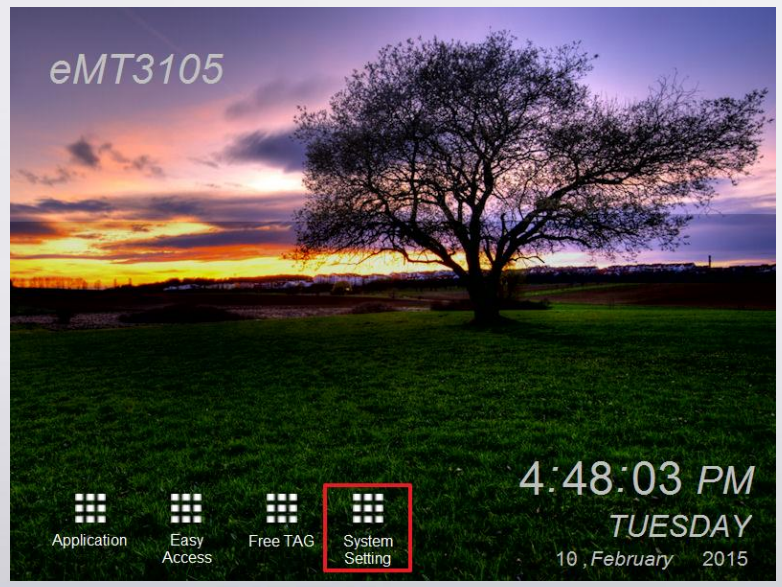
Step 1. Click on “setting” icon for the model.
a) iE series
b) eMT series
c) XE series

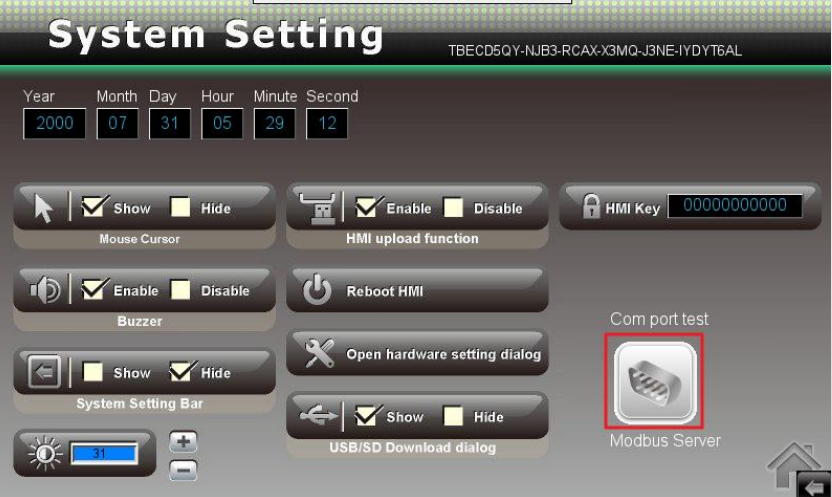
Step 2. Click the icon “COM port test” or “Modbus Server”.
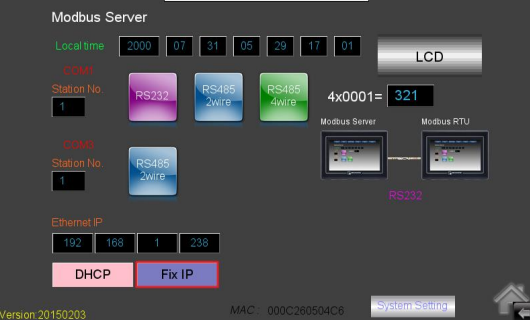
Step 3. Click “Fix IP”, and then IP: 192.168.0.211, subnet mask 255.255.255.0 will be set.
Finally, connect the computer and HMI with an Ethernet cable, and then set the network properties the computer as:
IP: 192.168.0.XXX (XXX=0~255, except 211)
Subnet: 255.255.255.0
Now the download utility on the computer will be able to find the HMI and download a project.
No comments to display
No comments to display