
64. How to Remove mTV / cMT Battery Voltage Indicator?
How to modify mTV / cMT motherboard in order to remove the battery voltage indicator feature?
The battery voltage indicator feature of mTV / cMT Series models can discharge the internal battery rapidly. Through a simple hardware modification, this feature can be removed in order to prolong the RTC battery life. This FAQ explains how to carry out the modification.
Removing this feature requires modification of the circuit by removing the following components.
Resistor * 2: located at R140, R141
Capacitor * 2: located at C127, C128
Step 1. Open the mTV enclosure:
|
|
Orient mTV as shown in the figure to locate the snap-fit that locks the cover to the case. |
|
|
Unlock the snap-fit and pull the cover in the direction as shown by the arrow sign in the figure. |
|
|
Remove the cover and take out the motherboard. |
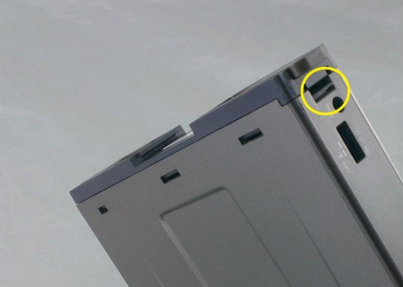
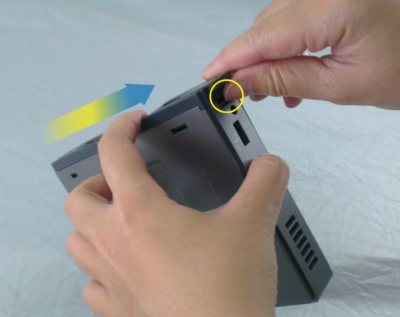
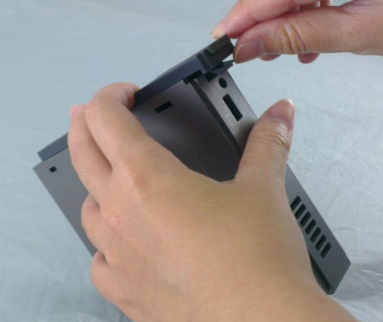
Step 2. Take out the motherboard and remove R140, R141, C127, and C128. The following Figure 1 and Figure 2 show the whole and partial view of the motherboard. (cMT motherboard has a different circuitry but it shares a common circuitry with mTV for this mod.)
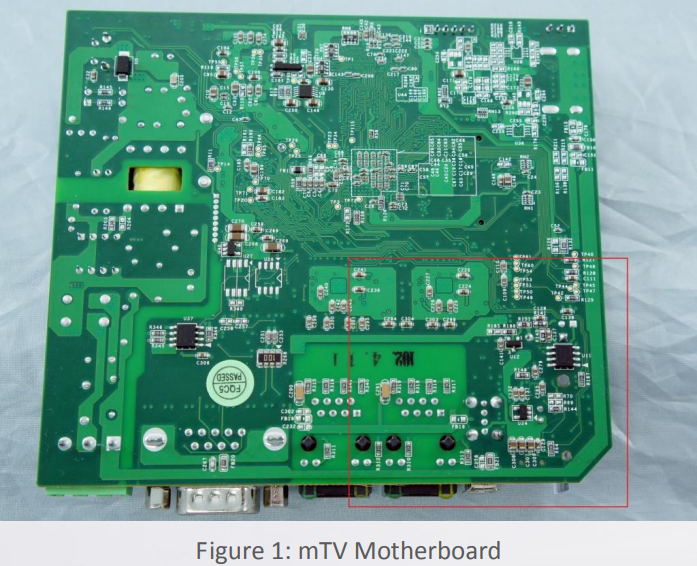
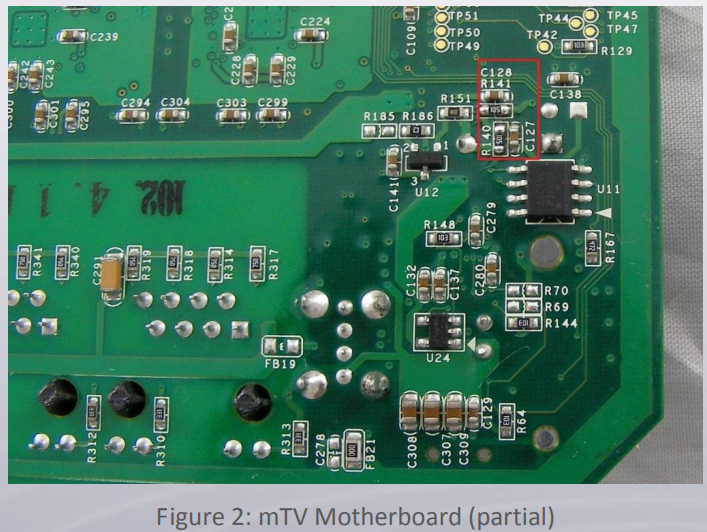
Find capacitors C127, C128, and resistors R140, R141 (Highlighted with red frame in Figure 2). Remove the components by using a 380°C soldering iron. Avoid short circuit to prevent damaging the unit.
Step 3. If the battery voltage is insufficient, replace the battery and then return the cover to the original position. The procedure is finished.
The battery life span will be greatly prolonged after the modification. Since the battery voltage indicator feature is removed, the EasyBuilder Pro system register LW-9008 (battery voltage) is no longer supported. For EasyBuilder Pro versions V4.00.01 or earlier, LW-9008 will display about 0.77V. For EasyBuilder Pro versions 4.10.01 or later, LW-9008 will display 3.0V by default
No comments to display
No comments to display